Sunday, November 25, 2012

The Lurve log…..

Every now and then I get the urge to do something nice for the ladies in my life (no, don’t worry, I usually get over it quite quickly…) but this poses a problem. If I bring Sinéad chocolates she just isn’t a big chocolate fan and it can be a migraine trigger. If I bring her flowers she wonders why and what I’ve been up to….
So over the years I’ve found cake is a good all round winner for both Sinéad and Alice. And what is better than strawberries – the food of love?

For a fast, quick and incredibly effective cake I recommend the Lurve Log (patent pending..). As for the other ladies in my life, well, that’s another recipe…

Ingredients
3 Eggs
80g Caster Sugar
1 Tsp Vanilla Extract
80g Plain Flour
1 Tbls Warm Water
250g Strawberries
2 Tbls Granulated Sugar
250ml Cream
1 Tbls Sugar (preferably Vanilla)

Heat the oven to 190oc
Line a swiss roll tin (lipped baking sheet) with greased parchment paper. Sprinkle the parchment liberally with caster sugar.

Whip the eggs, caster sugar and vanilla extract together for 5 minutes at high speed.
Slide the flour down the sides of the bowl and fold in, in three stages. During stage 3 add a tablespoon of warm water. Try to preserve as much of the air in the whipped mixture as possible.
Pour into the swiss roll tin and spread gently into all the corners.

Bake for 10 to 15 minutes until just golden.

Whilst the cake is in the oven reserve one third of the strawberries. From this third, select one or two large ones to cut slices straight down from top to bottom leaving 4 to 5 heart shape pieces for decoration.
Take any remaining pieces and the rest of the third and chop roughly. Set aside.
Place the two thirds of the strawberries into a blender along with the 2 tbls of granulated sugar and pulse until smooth. A tablespoon of sherry or marsala may be added if desired. Mix in the chopped strawberries.

Whip the cream with the tbls sugar until stiff peaks form.

Take the cake from the oven and turn out onto a new sheet of parchment which has been sprinkled with caster sugar. Let cool for ten minutes then gently remove the backing parchment.

Working quickly, spread the strawberry mixture evenly on the cake. Spread a layer of cream over the strawberries stopping about 2 inches from one side. Turn the parchment so the edge with no cream is furthest away from you. Start to roll the cake using the parchment to support the cake. Roll gently but not too loosely until you get to the end. The cream will have pushed out ahead of the roll hence the gap at the end edge.

Dust with caster sugar and decorate with strawberries. Slice up and feel the lurve….

Wednesday, October 10, 2012

Smokin’


I started this blog post in end August– let’s pretend I posted it in September…

I haven’t done an Alton blog post for a while and this fact, combined with a week off and a MASSIVE desire to smoke my own food brings me to the Good Eats episode “Right on Q” – Alton’s foray into the, often confusing world of Barbeque science and recipes.  In this episode (check YouTube if you are not in the US), Alton demonstrates the best way to use a gas or charcoal grill as a smoker but best of all shows us how to build a proper smoke box using, in his case, a wood reinforced cardboard box, some oven racks and an electric hob.

Oft have I watched this episode with the imagined senses of authentic smoky ribs and infused turkey playfully dancing in my head – you seriously have no idea what goes on inside there….

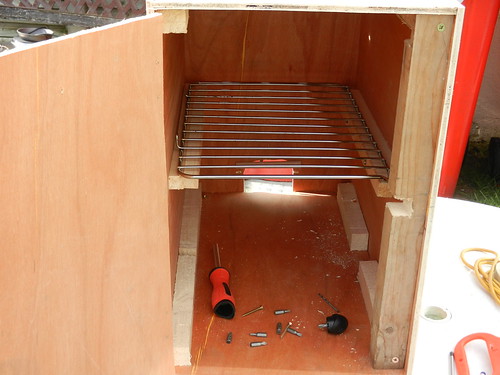
This week saw Lidl selling a double electric hob for €30. I picked this up when I saw it and set about to getting the rest of the equipment together. The racks were “recycled” from an oven being dumped at our local recycling centre. A night in a bag with a bottle of oven cleaner and they were as good as new. A cast iron pan was called for to hold and burn the wood chips so I went to a local kitchen / restaurant supply shop. Cast iron pans, as it turns out are not cheap but lady luck smiles occasionally and I picked up a cast iron fajita dish which was (very) slightly damaged and without its base for €5. The wood cost €15 from the local builder’s merchant. Total cost under €60. So with drill in hand and a sparkle in the eye (should have worn goggles) I set about the fulfilment of a long held dream to make my own smoker…
Now there was no particular plan to this project – Carpentry is unfortunately not my forte so the mission was to make a box large enough to hold the electric hob and high enough to ensure the meat is not too close to the heaters to burn.
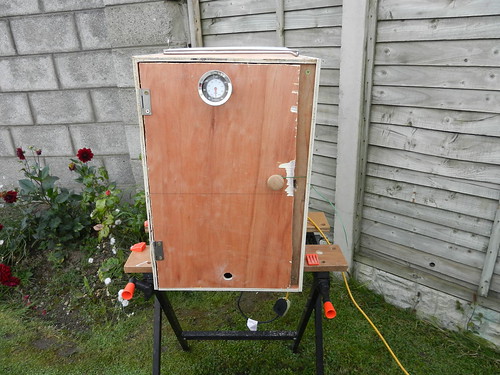
Once the box was completed I drilled a hole in the bottom of the front door and three holes in the top back. These can be blocked off with corks to increase or restrict airflow as required.
I installed a thermometer through the front door to monitor the air temperature (220of) and the meat can be monitored via a remote meat thermometer put through one of the holes in the top of the box. There is a small removable section at the rear of the box to allow access to the second hob control

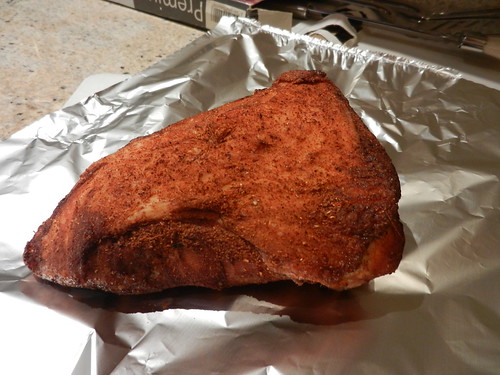
Onwards then, stout yeoman, to the testing of the Pandora’s Box of smoking magic. First we need to soak about 3 cups of woodchips for at least an hour. Thankfully I had already thought of this and the pecan wood chips were already in the water. On to the meat – I didn’t have time to get ribs so a quick trip to our local butcher procured a quarter of a Turkey breast. No time for a brine, so a basic rub will do (see Dr. Pepper Pork Chops - I had some left over..). While the Turkey is sitting in the fridge, I cranked up the main burner to full and the secondary burner to the mid-point and set the cast iron dish on the main burner. After five minutes or so, I added the woodchips to the pan and placed the turkey on the rack with the meat thermometer inserted into the thickest part of the meat. The woodchips need to be changed about once an hour.
I closed the door and 5 minutes later there was smoke – proper smoke – like on the telly…
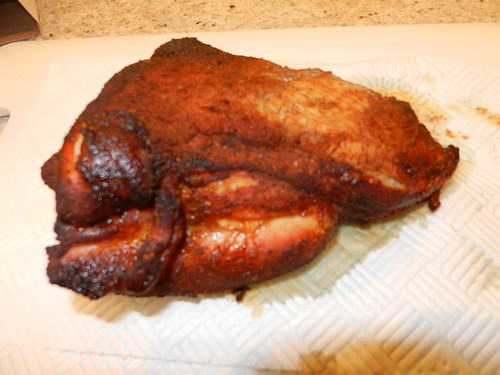
In goes the turkey for three hours. Ok, so here’s the deal. I realise that most people don’t get excited about barbeque and smokers like I do but this was the longest three hours I can remember. When the thermometers binged we opened the door to exactly what we wanted to see – a perfectly smoked tender and juicy piece of turkey perfection. A 15 minute rest and some homemade bread (bottle of Crabbies optional). The crackle of the crusty bread, the juice of the turkey, the tear in my eye… excuse me, I might need just a moment..*sniff*

Monday, August 27, 2012

Dr Q, I presume…..?


NOOOoooooooo...I dropped a stitch

Once a year there comes a time that strikes fear into the hearts of those of us who are married or partnered to knitting people. People who knit we can deal with, but people who treat knitting as a 35 year old single man living with his parents treats Star Trek are truly terrifying. And spinners. Don’t forget the spinners…..and crocheters (if that’s a word). Once a year, these people amass in the fair County Cork to touch, fondle and otherwise molest innocent wools and yarns in the name of FIBRE FEIS, the annual gathering of the immortal fibre enthusiasts who fight to the death until the last one stands - THERE CAN BE ONLY ONE………..Well, OK that’s Highlander the movie but c’mon, wouldn’t that be great??

So Fibre Feis is an annual gathering of friends and family who get together once a year to meet up, camp over and discuss all things…well… fibrous. No, not the dietary kind – that’s a way different party. Long story short, Fibre Feis is a great bit of fun and food (and not an inconsiderable amount of drink) and this year was no exception. It is a BYO affair with contributors bringing everything from tomato and mozzarella salads to couscous, brownies to artisan chocolate cake and homemade beers (thanks Phil).

This year I decided to bring Dr. Pepper Pork Chops and Sinéad made two fabulous Madeira cakes (from a closely guarded secret family recipe). Thankfully, people were polite and said they enjoyed them although this did appear evident by the fact the first plate of finished chops were gone in seconds…..

To Sue and Phil and to all those who organised, contributed and turned up – many thanks for a great day and we’ll see you again next year. For those who asked, here’s the recipe – I used this volume for 12 chops.


The Brine
¾ of a 500 ml bottle of Dr. Pepper Soda (full fat, not diet)
2 Tbls Balsamic Vinegar
2 Tbls Apple Cider Vinegar
4 Tsp Dijon Mustard
4 Tsp Coarse Salt
2 Tsp Black Peppercorns
2 Tsp Dried Sage
2 Tsp Dried Marjoram
Mix all the ingredients together into a zip top plastic bag and place in a container. Place the pork chops into the bag and squeeze as much air out as possible before sealing the bag. Place the container in the fridge for 4 but not longer than 8 hours.
Take the pork chops out of the brine and pat dry with kitchen paper towels ahead of applying the rub.

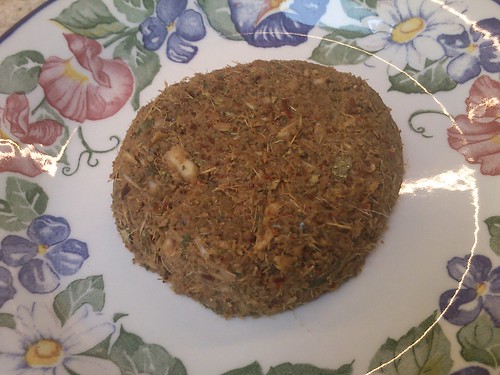
The Rub
1 Tsp of your favourite chilli powder
1 Tsp garlic granules
1 Tsp coarse salt
1 Tsp smoked paprika (or normal paprika)
½ Tsp ground coriander
½ Tsp ground cumin
Few grinds of black pepper
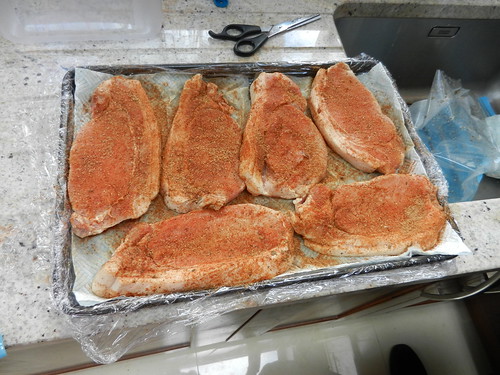
Mix together well and apply liberally to both sides of the chops (I use a small flour shaker).

To Cook
Fry, grill or BBQ as you would for a normal chop - 7 to 10 minutes depending on the thickness of the chop and method of cooking, turning once half way through.


Only picture I could get of the finished produce (sorry)

To Serve
Hang a sign advising “the Doctor is in”, prescribe one pork chop in a crispy buttered baguette and see them again next Tuesday if it doesn’t cure all that ails them. Charging €60 is entirely optional……

Sunday, August 12, 2012

A minute on the lips, a lifetime on the Thai’s

Dr. Who is the guy… suave, sophisticated and always right and why not? He is, after all a Time Lord who, when things go wrong and the girl dies, can go back in time sort it out save the girl and appear a hero to all us mortals who didn’t cop that this was his fifth time trying….. For the rest of us time is a horrible linear thing that keeps going in one direction far too fast. Which, incidentally, is my way of saying "Sorry, I’ve been too busy to devote any time to blogging and I owe you a few recipes"

So here goes…

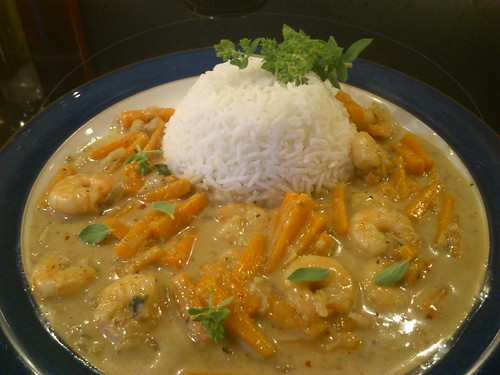
A couple of weeks ago, Sinead and Alice brought her parents away for a few days to the south of Ireland (Dungarvan in Co. Waterford – fantastic part of Ireland for any of our readers abroad). I was going to Donegal (far north of Ireland) for a few days on business so I couldn’t go. This did give me two days to myself (hurrah). Long story short, we both had a miserable time as the weather was rotten and my wife had to cut the week short due to a serious family illness. But on the two days to myself, I got to have buckets of prawns (‘cos Sinéad doesn’t like them). And the best way to enjoy them? Thai Red Curry, of course.

This recipe has taken a lot of trial and error to get right but (imho) if followed correctly it will give top restaurant quality results.

To make the Red Curry Paste: (This makes enough for two portions about 4 good tbsp– I freeze the second portion for later)

Red Curry Paste
Ingredients
8 long red dried chillies, deseeded and chopped
1 tsp. ground coriander seed
½ tsp. ground cumin seed
1 tsp. ground white pepper
2 tbsp. chopped garlic
2 stalks of lemongrass, chopped
Small bunch of fresh coriander, chopped
1 tsp. finely chopped kaffir lime leaves
3 cm. fresh galangal or ginger, peeled and chopped
2 tsp. shrimp paste (see note 2)
1 tsp. salt
using a mortar and pestle, grind all the ingredients into a thick paste (OK – I use a small blender…)
(Note 1 – on the day I made this I had no fresh ginger or coriander so I used fresh Basil and 1 tsp ginger powder)
(Note 2 - Just a warning if you have never used it - Shrimp paste has a very "pungent" aroma - please bear with it - there is no smell in the final dish - trust me, it will cook away.....)
(Note 3 - Yes I know what it looks like - get past it  and you will be rewarded....)


Thai Red Curry
Ingredients
2 tbsp. peanut or sunflower oil
2 tbsp. red curry paste
400 ml. coconut milk
200 ml. vegetable stock
4 small carrots sliced (parboil for 6/7 minutes to soften first)
2 red or green chilies coarsely sliced
3 tbsp. light soy sauce
2 tsp. sugar
½ tsp. salt
fresh basil leaves
Add any veg you want or use prawns / chicken / beef / pork
If using chicken/beef/pork, sauté in a little hot oil for a few minutes then reserve.

Heat the oil in a medium hot pan, then quickly stir in the curry paste
Add the coconut milk, and stir to combine then add the vegetable stock, stir briefly
Add the prawns/meat/veg, carrots, chillies, soy sauce, sugar and salt.
Bring to a rolling simmer and cook for about 10 - 15 minutes, until the sauce reduces (it should be able to coat the back of a spoon)
Add the basil leaves, stir and serve with rice or noodles

Serve with Old Jamaican Ginger Beer as it picks up on the spices and ginger in the dish and not the (www.crabbiesgingerbeer.co.uk) Crabbies delicious alcoholic ginger beer ‘cos I wouldn’t be having fun on my own, oh no, I would be missing my wife…. Not drinking crabbies no, not me, missing my wife not Crabbies ‘hic’

Monday, June 25, 2012

I am the eggman, they are the eggmen. (coo coo g'coo)


Nothing like cooking to bring a family together. Either you love it and it is your “go to” place for relaxation, inspiration or just good old enjoyment or you love your other half’s “go to” place for relaxation, inspiration or just good old enjoyment and you can lick the spoon and eat the results…..
But, for me, I will admit getting Alice involved in the process gives the most rewards. Like all 11 year olds she is not the most responsive at the idea of peeling pots of potatoes or washing the dishes afterwards but put a bowl of mince, herbs and egg in front of her and it’s all hands in until burger / meatloaf / whatever is thoroughly squished, squelched and mashed into submission. Who needs a mixer?

This weekend we were making ravioli from scratch (post to follow) and I was showing Alice how to beat an egg with a fork and I remembered that Sinéad and Alice made little eggmen last Easter to decorate the table.

And so, for no other reason than a bit of my own nostalgia, may I present to you “The Eggmen” by Alice….

Sunday, June 24, 2012

Only here for the Krack(en)


Some things just have to be done. Don’t think, don’t plan, just do. Your first kiss, your first parachute jump, the first time you dissect a squid….. If you spend time discussing, analysing and justifying some things, you will never do them. I discovered Calamari in Italy in 1992. In fairness, looking back they weren’t the best examples of calamari – they were on the rubbery side and were quite oily. (I also didn’t know they were squid at the time or I probably wouldn’t have eaten them – I thought they were some kind of Italian onion rings…oh the innocence..). But I did eat them and have eaten them ever since. But as for cooking these strange and somewhat frightening cephalopods, where do you start?
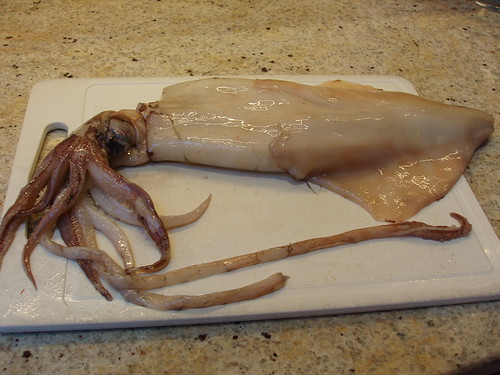
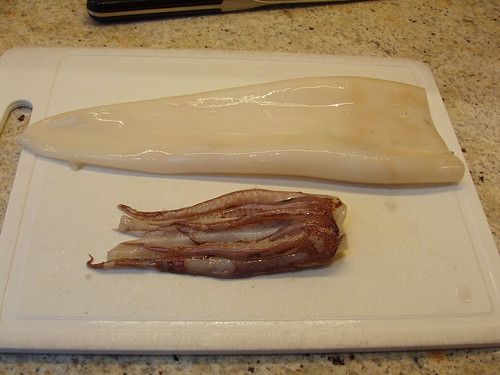
So when we saw the Good Eats “Squid Pro Quo” episode, Alice (in a mixture of awe and horror - as only an 11 year old can simultaneously display) decided that this was something that had to be done. Off to the fishmongers did we trot and returned did we with a creature of sac and tentacles and eyeballs and – well, you get the picture. Seriously though, I ask you, who first looked at these and thought “mmm, those look yummy”?... I mean look at them….
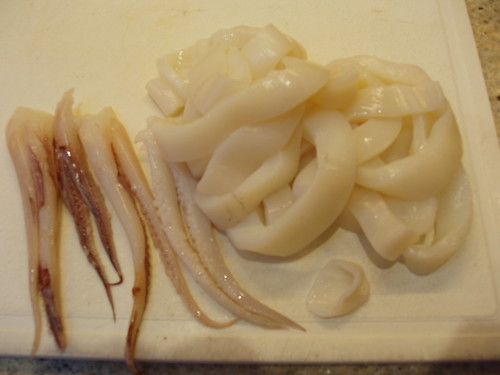
For the sake of those who may be squeamish, I will refer you to “Squid Pro Quo” for full instructions on how to slice and dice but suffice to say, after a few minutes, a full set of usable parts lay before us (and it wasn’t that hard either).
Some more slicing to create the rings and separate the tentacles and a quick dip in the batter and we are ready to fry.
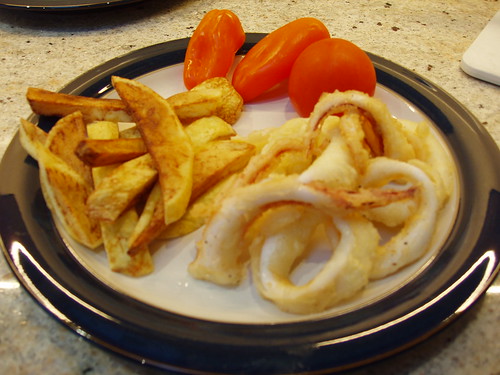
We decided, as the oil was on anyway, to serve them with some chips (fries for our U.S. friends) and a few minutes later a platter of deliciousness was placed on the dining table. A quick sprinkling of salt and some sweet Thai chilli dipping sauce and dinner is served. The best part was watching Alice making a point of eating the tentacles first, to show “that she could”…
I would fully recommend that you give it a go, particularly if you cook with your kids, but would also say that you can buy packets of frozen mantles (the body of the squid from which you cut the rings) if you would prefer not to go through the hassle of dismembering a fresh one. These will do the same job. Don’t think, don’t plan, just do….

Monday, June 11, 2012

Meat me in St. Louis


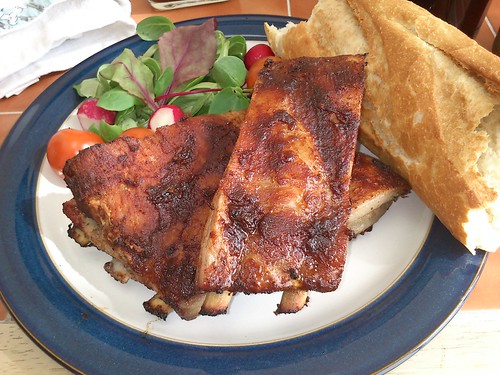
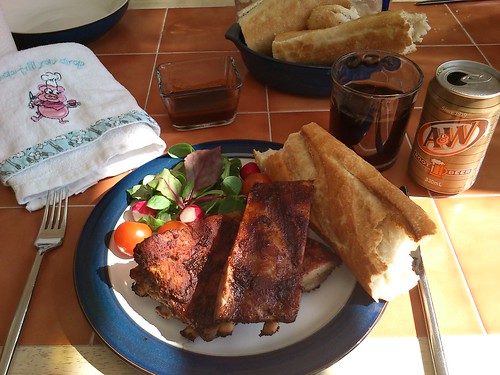
Consider your final meal….. the last tasty morsel of deliciousness that will ever tingle your taste buds and fire those sensory neurons in your brain – how important would it be to get it just right? Not that I would want it to be anytime soon but I have given this a little thought. For me, the ideal menu would start with a fresh chicken liver pate with thinly sliced onions on a crisp melba toast, finish off with a baked sour cream cheesecake and, in between, tender, juicy and succulent barbequed pork ribs, lightly smoked and falling off the bone. Armed with this I would be well prepared for the eternal nap on the sofa in front of the celestial T.V.


But what constitutes good pork ribs? Sadly, in Ireland, a decent rib I have yet to experience. I have tried many attempts in various restaurants but invariably they fall short by being either chewy and tough or dry and overcooked. A good rib is a skill only achieved by practice and heat control and the right seasonings. Having a good butcher on standby is also a great help.


This brings me nicely onto the subject of today’s post – the wondrousness of the St. Louis Cut Pork Rib.

In the US there are two types of ribs – Baby Back and St. Louis. In short, the baby backs are the part of the rib nearest the spine. These are tender but not very meaty and are what are normally sold in butcheries in Ireland. The St. Louis cut is after the baby backs and before the rib tips. These ribs are much meatier but tougher and that requires some more attention during the cooking process – but the final results are so much better in both flavours and a satisfying “bite”.

For the last year I have tried to find a butcher who will take the time to understand my requirements and again I must refer to Brendan Keenan from Keenan & Kennedy Butchers, http://www.keenanandkennedy.com/. Brendan took the time to look up St. Louis Ribs on the internet and sold me two perfectly cut racks of meaty deliciousness. (and no, he doesn’t pay me or reduce the bill for saying that….)

There are four steps to the perfect rib:
1) Preparation
2) Flavouring (The Dry Rub)
3) Cooking (The Braising Liquid)
4) Finishing (The Sauce)

The Piggly Wiggly Ribs

The Rub
5 Tbls Light Brown Sugar
1 Tbls Kosher (coarse) Salt
1 Tbls Chipotle Chilli powder (or whatever chilli powder you have - measure according to heat..)
1 Tbls Smoked Paprika
1Tsp Dry English Mustard
1 Tsp Garlic Powder
1 Tsp Onion Powder
1 Tsp Old Bay seasoning (optional and only if you can get it…seriously Irish retailers – Old Bay and Kosher Salt – Why does no-one here sell these??)
½ Tsp Black Pepper

Mix well together and put in some form of shaker (I use a magic bullet – got one some years ago and it’s the only thing it’s good at….)

The Braising Liquid (enough for two racks – halve if only doing one)
1 Cup (250 ml) Apple Juice
2 Tbls Apple Cider Vinegar
1 Tbls Worcester Sauce
1 Tbls Honey

Mix together

The Barbeque Sauce
½ Cup (125 ml) Apple Juice
2 Tbls Apple Cider Vinegar
2 Tbls Tomato Puree
2 Tbls Irish Whiskey (or Bourbon) (or optional)
1 Tbls Soy Sauce
1 Tbls Worcester Sauce
2 Tsp Molasses (Black Treacle)
2 Tsp Light Brown Sugar
1 Tsp Dry Mustard
½ Tsp Garlic Powder
½ Tsp Onion Powder
½ Tsp Chipotle Powder
½ Tsp Kosher Salt

Mix together in a heavy bottomed pan over a low to medium heat. Bring to a simmer and reduce by half (about 10 minutes) Let cool – I do this part after the ribs are first put on. (Note – reserve some sauce for dipping etc before you use it on the ribs)

Preparation - Firstly inspect your ribs (same for the baby backs – don’t miss this step). There will be a membrane on the inside (bony side). Push the back of a teaspoon or blunt knife under the membrane and work it until you can get a finger in under the skin. Then pull the membrane and it should pull away cleanly from the meat.

Flavouring – sprinkle the dry rub liberally on both sides of the ribs. Pack into a large Ziploc bag (I get mine from Ikea – the largest bags are ideal) and press as much air out as possible. Alternatively, wrap well in plastic wrap. Store overnight in the fridge. Take out of the fridge ½ hour before you go to cook them next day.

Cooking – The secret to good St. Louis Ribs is to cook low and slow. As this is Ireland, and most barbeques here are basic models (compared to the American models), it tends to be difficult to keep the temperatures consistent over long periods. This means that the best BBQ ribs are actually cooked in the oven (please don’t stone me just yet….)

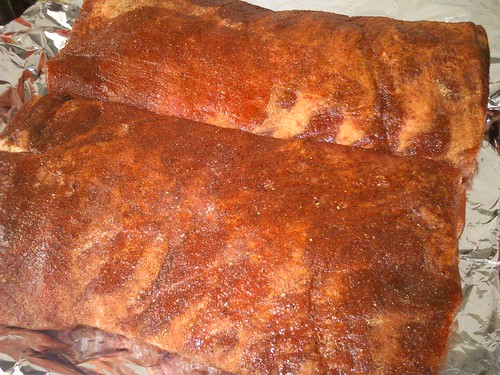
Heat oven to 250F degrees. Place the ribs on a sheet of aluminium foil which has been doubled over (the final sheet size must be large enough to wrap the ribs in a parcel). Bring the two side edges to the top and seal tightly. Seal one end tightly. In the other end pour in half the liquid (if doing two racks) in each of the parcels and seal tightly. Place onto trays and place on the oven for 3 hours. (less if making baby back ribs say 2 ½ hours). After three hours test the “doneness” by twisting a middle bone – If it pulls away from the meat you are ready to finish - if not give it another half hour.

Finishing - If finishing on a BBQ light it ahead of the estimated oven finish time according to your BBQs instructions. If it’s raining, snowing etc (as it invariably is in Ireland) finishing in the broiler (or grill as it is in Ireland) will also work – just be sure to move the rack down from the elements. Add smoke to the BBQ by soaking hard wood chips for half an hour beforehand, wrapping in foil, piercing the foil a few times and placing on the hot charcoals or gas covers (not the elements directly). Place the ribs onto the grill rack (bony side down) and baste with the sauce. Cover and let the smoke do its work – note this will be enough to give a smoky taste to the ribs but will not give the pink smoke rings that BBQers crave in competition – this is caused by the meat being prepared for hours in a smoker which is advanced BBQ juju - trust me, we haven’t got to that level yet – you’ve only just learned about St. Louis Ribs for God’s sake…..

Keep basting every three to four minutes or so for 10 to 15 minutes (we are just looking to caramelise the sauce a bit) then let the ribs rest for 5 minutes.

Slice down between the bones to present for parties or, as I do, grab one full rack and run off into a corner, wide eyed and snarling at anyone who tries to take them off you as you suck the meat off the bones oblivious to the juice running down your chin whilst chanting “precioussss, my preciousss”…..oh – probably too much information….

Monday, June 4, 2012

Laws and Sausages....

To quote Leo McGarry from TVs The West Wing (the late but great John Spencer) "There are two things in the world you never want to let people see how you make 'em - laws and sausages". I always had a hankering to make sausages - once you have the basic recipe there is a world of flavours out there to combine and mix until you have your own special signature sausage that you can roll out at family get-togethers and barbeques to oohhs and aahhs from the appreciative audience.
But where to start? I have read many tomes and guides into the strange world of fat and innards and it is a slightly scary place. I started by watching Season 7 Ep 06 of Good Eats (A Beautiful Grind) and this gave me a number of very good pointers not least being - Find a good butcher and get to know him. Having a person that is willing to take time to understand what you need and then provide you with quality product is half the battle.
Remember the Pink Floyd video?
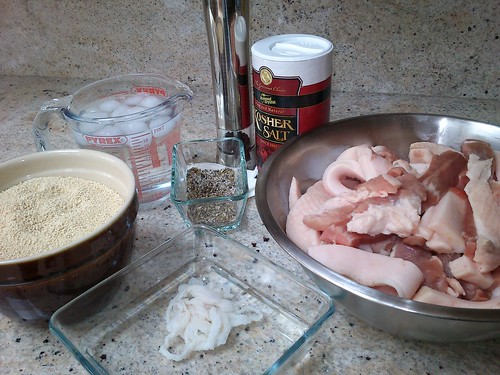
Thankfully I happened upon Brendan Keenan from Keenan & Kennedy Butchers, purveyors of all things porky: http://www.keenanandkennedy.com/. Brendan took time out of a busy day to actually bring me behind the shop counter into the manufacturing plant where they churn out pounds of award winning specialty sausages and puddings. He was happy to impart the knowledge of a lifetime to a complete beginner and was able to supply me with the pork belly, back fat, proper rusk for the filler and, most importantly, the natural casings (we won’t dwell too much on that……). He also advised me on some of the techniques and pitfalls of home sausage making and wished me luck as I happily left this shop of wonders laden down with a box of fresh pig bits.

Real Kosher Salt - only used for special occasions as we can't get this in Ireland
First to Good Eats again – We watched the episode noting the way AB made his sausages and compared this to Brendan Keenan’s advice – both the same, so far so good…. AB has a KitchenAid with the correct attachments as do I. All the meat, bowls and utensils are chilled…check. Ingredients, apart from the mains mentioned above we went for sage, marjoram and thyme with salt and fresh crack black pepper – traditional and safe basic breakfast links recipe.
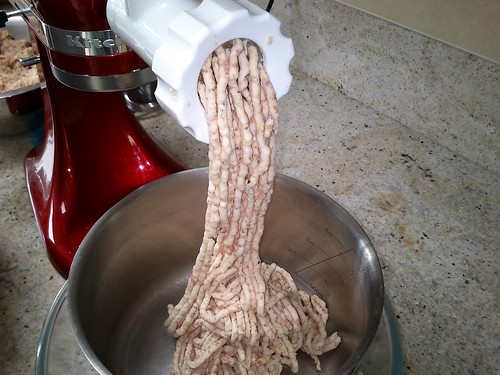
We started with the casings – rinse thoroughly and, by running water gently through them check for any bursts or tears then thread onto the stuffing attachment. Thankfully Sinéad volunteered for this job as it really is fiddly. I started the first grind, pushing the pork belly and back fat, cut into strips, through the grinder. This went smoothly and, once finished, added the rusk, water and seasonings to the mix and combined by hand. Refrigerate for an hour.

After the hour was up (secret is to keep the mixture cold at all times) the second grind also passed without incident. We refrigerated for a further half hour and then prepared for the stuffing.
What appeared easy on Good Eats was not what we experienced. OK, I understand it was our first time but feeding the mixture into the attachment was exceptionally hard. No matter how we loaded the hopper, there were still pockets of air and the auger in the stuffer refused to pull the mixture into the stuffing tube. We only managed to stuff the sausages by the application of a substantial amount of force on the plunger. I understand from speaking to Brendan afterwards that the best machine for home sausage making is an old fashioned hand crank machine as 1) it doesn’t heat up the meat as was happening in the KitchenAid and 2) the speed can be controlled better helping to draw the meat into the stuffer.
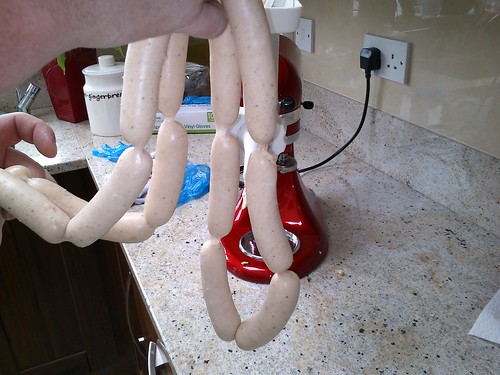
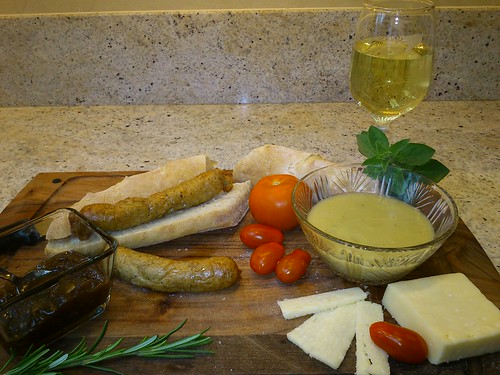
Despite this, however, we did get sausages. A lot of sausages. About five and a half pounds of sausages. And, although they weren’t as firm as we would have hoped, they did taste good. And combined with some homemade bread and a red caramelised onion relish and Sinéad’s awesome potato and leek soup we deemed the day a success. Then, because this took all day and we were wrecked, we went to bed…..early.

Sunday, May 13, 2012

Owww

This has been a busy weekend - Discovered how to make the best bread yet, made Alton's Apple Pie and, (and this is the best bit....) made our own sausages from scratch (yes with natural casings).  Full details coming soon but for now it's cleanup time - Seriously - if you ever make sausages be prepared for hours of cleanup, like, literally....hours. This followed by tea, solpadeine ('cos my back is killing me) and an early night.
So I bid you a good night to all and to all a good night.

Tuesday, May 8, 2012

The Wicked Witch of NYC.....

It's been a funny old week and I haven't had any time to indulge my culinary juices despite the fact that it was a bank holiday weekend in Ireland. I was travelling a lot last week and had reports and paperwork to catch up on so by the time Friday evening rolled in I was exhausted. One highlight, however, was in Carlow town on Wednesday afternoon, a place I had never associated with high cuisine.

I, man the hunter, stalking my luncheon prey down the eateries of Tullow Street, happened on a tavern called Reddy’s on the main crossroads. I entered, hopeful of trapping a soup and sandwich (a wily adversary I can tell you...) but noticed that they served Chicken Liver Pâté. Now I am a complete sucker for a good pâté so I ordered it with extra toast. After explaining, to the chef behind the serving counter, that I could quite easily live on chicken liver pâté and toast he kindly gave me an extra portion – woohoo freebies!! He informed me that it was made fresh on the premises and it really tasted like it. A really good pâté – something to consider should you ever pass through Carlow (and if you like pâté..) – Gonna have to try and make it myself soon.

So back to Friday and our minds turn to the weekend and the fact that my sister’s eldest daughter is leaving for the States for a year on Monday. They were having the family around on Sunday for a “cup of tea in the hand” so we could all say goodbye (in the finest traditions of an “American Wake” sans alcohol). I thought it would be nice to bring around my world famous cheesecake (that’s famous in “my world” you understand). Now blame cake boss et al on the food network channel but I found myself thinking “gosh, wouldn’t it be cool if I made a Statue of Liberty holding an ice-cream and with loads of shopping bags as a decoration”. In my head I could see a replica of the Statue, perfectly sculpted with my niece’s face. Never having done this before and armed with two blocks of marzipan and assorted food colouring, I settled down to moulding the perfect decoration. Two and a half hours later I had created……the Wicked Witch of the West flipping the bird at New York City.
 Ok this was not what I had anticipated and I went back for round two. A half hour later I finally admitted that this was probably what bakers went to college for and decided to call it a day with at least a more favourable face on the Statue. The end result wasn’t too bad and the cheesecake disappeared in minutes. I know she appreciated it and, if she is reading this we wish you all the best in NYC and hope you enjoy your great adventure.

Sunday, April 29, 2012

A Big Mis-Steak?? Part2

A Strange Alien Ex-Lifeform...
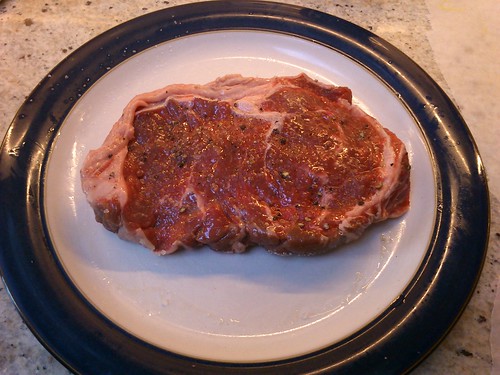
And so to Saturday – Steak Day in the Old Fella’s household. Sinéad and I looking over the table at this large, pink, alien piece of muscle and fat sitting on a plate and sort of looking back at us. Sinéad looked at me – I looked at Sinéad - we looked at the steak. Could we do it? Could we actually eat this? Could we put so many years of bad memories behind us and actually eat this? “We’re having STEAK???” squealed Alice from behind us. Two things shot through my head instantaneously – 1) I’m not being beaten by my 11 year old daughter who loves beef and 2) how come my 11 year old loves beef when we don’t? Sinéad left the room….
The Menu
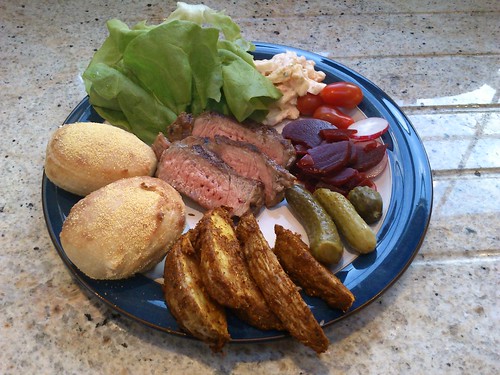
I decided to keep this simple. If we were going to do this we felt it was important to ensure we could taste the steak and not cover it up with something like a pepper sauce, at least for the first time. So we agreed on Rib Eye Steak, Salad, Spicy Potato Wedges and Homemade Dinner Rolls. Can I be really honest here and say, yes, we did have a packet of sausages in the fridge just in case.

After watching Series 1 Episode 1 of Good Eats “Steak your Claim” I had paid visit to the local butcher and chose a nice steak – good colour with some marbling about 1½ inches thick. If you are in Ireland check out Good Eats on YouTube as it isn’t broadcast on the Food Network here (what’s up with that?) The books are available on Amazon and I thoroughly recommend them.

At this point I turned to the wedges …This is so much nicer than any of the packets you buy in the supermarket (good for vegetarians too...)

Spicy Potato Wedges
3 to 4 mid to large firm potatoes (I used Roosters)
2-3 Tbls Vegetable oil

Spice Mix
1 Tbls Paprika
1 Tbls ground Coriander
1 Tsp Cumin Seeds (lightly crushed)
1 Tsp Turmeric
Pinch of Salt and grind of Pepper
I added a ¼ Tsp of Chipotle Chili Powder to give a kick – omit if you don’t like chili or use any standard chili powder if you prefer.

Preheat the oven to 200oc
Cut the potatoes into half, then quarters, then eighths. Parboil for 3 minutes in a large pot of boiling salted water. Drain well. Return to pot.
Add the oil and toss gently to coat. Sprinkle the Spice Mix over the Potatoes and mix well.
Spread out onto a baking sheet and bake for 35 to 40 minutes turning once until the wedges are golden, soft and fluffy.

So we fired up the cast iron pan and cooked the steak according to the instructions. Prepared the salad. Buttered the rolls. Put the wedges into a warmed dish. Plated. Looked. Looked again. Breathed deeply. Ate……
And it wasn’t terrible. We couldn’t believe it – a good steak properly prepared was …actually nice. And the biggest surprise was that the pinker meat in the middle was tenderer than the well done parts at the edges. The TV chefs actually know what they are doing – who knew? And yes – we will be eating it again. I might even try roast beef next……

Saturday, April 28, 2012

A Big Mis-Steak??


Like so many of my generation growing up in Ireland in the 70’s, meat and two veg (one of which was potatoes) was all you got…ever. And, like so many of my generation growing up in Ireland in the 70’s it was, erm, “well cooked”. In fact, Red Meat such as roast beef, lamb, pork was rarely, if ever, red. It looked more greyish brown due to the fact it was put in the oven on Sunday before 10 o’clock mass and taken out between 1 and 2 for dinner – whatever the size of the joint….

Now don’t get me wrong – my mother is an excellent cook. She loved to try new things picked out of magazines and books and I still make her sausage stuffing (like a sausage meatloaf) and her chicken curry casserole (none of my friends had ever had a curry that wasn’t a pot noodle).

But despite the fact that she was a good cook and that I knew what a frankfurter was, the Sunday Roast was always a trial for me. Slices of this roast beef with beef gravy and soggy beans. But what got me was that everyone else in the family (parents and four other siblings) loved it. It was just me. I couldn’t swallow it and the smell alone made me gag but I was made to finish it every week. Why was I so different?

Years later, I met my wife, Sinéad, and found out that she had the same issues. I had a soulmate and so I married her (what do you mean that’s not the basis for a sound marriage?). During our long late-night discussions, I realised that we both also wondered at these TV chefs who served up these cuts of beef that were RED and had JUICES to eager and shiny f-list celebs who tore into them like early man to a mammoth steak. Surely those were undercooked and therefore would kill you by being in the same room?

The point of this blog is that I have to face up to certain realities. I am a reasonable amateur cook with a passion for trying new techniques and styles of cooking. I love Asian, particularly Thai, food and have no trouble making a Thai red curry from scratch. I also have a particular affinity for Southern U.S. cooking and make a mean Fried Chicken and Biscuits. I do not; however, do roast Red Meats or Steaks (or most veg for that matter) well. Through this journey I am going to face my fears and (with A.B.’s help) will make and eat those foods that have caused me to pass out in terror. I have come to realise that my pallet needs to be re-educated and this starts now – with a big juicy Rib-Eye Steak.

I have been to the butcher – the hunk of cow is in the fridge and I will let you know tomorrow if I am an Alpha Male or a Wimp……

Tuesday, April 24, 2012

Oh My! Where was I??

I swear, I only closed my eyes for a minute.  I was feeling tired and lay down for a second - suddenly it's eighteen months later... awoken by a kiss from my princess - well a swift kick but that's not important right now. 

I arose from my slumbers and went downstairs to see how the world has changed.  I was amazed to see a  shiny new and wondrous kitchen resplendent in it's shininess and looking..well..shiny. This, combined with a new Good Eats book (3 - The Later Years), I knew that I was awoken for a reason, no, more than a reason, - a MISSION. That was it.... - I have a purpose in life.. to make something each week from Alton Brown's Good Eats and share it with you, dear reader.  

So please feel free to join me in a cooking experience, an homage to one of the best cooking shows on TV as I attempt to increase my culinary skills, test my new kitchen and have a bit of fun on the way. 

Over the next while I will be trying to make a different recipe from Good Eats each week and will post my journey, the failures and successes. I will also be trying new styles and techniques in other world cuisines in an effort to expand my repertoire and prove to myself that healthy cooking is more than just a hobby - it's a way of life.

Starting next weekend I will be hoping to blog at least once a week - just bear with me as I try to get to grips with the technology.  I would love to hear your comments, views or thoughts on the results and any tips from experienced bloggers are always graciously accepted.

Lastly, there are many food blogs out there - thanks for taking the time to read mine.  I hope you enjoy it....
......To the kitchen and beyond!